Collecting Seeds from Columbines
By sean50p
4 comments
I’m in real danger of teaching my Granny to suck eggs but for those of you who might like to know how to collect seeds from Columbines here is a quick demo.
As you may or may not know I love my columbine flowers…
 Columbine (Cam C902)
By the end of July, beginning of August they are at the stage where you can collect their seed for propagation next year.
Although the original plant should come back each year as they are perennial, collecting and sowing your own seeds will help to spread the flowers across the garden where you want them. Or you can give the seeds to friends or even grow them in pots to give as gifts?
Collecting the seed is really easy so I thought I’d show you how. Nothing special is required at all; a container and a pair of scissors.
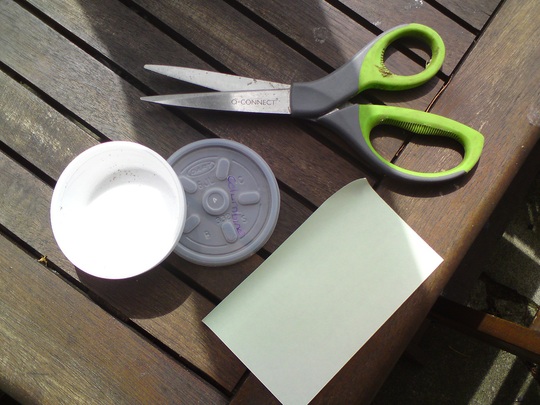 Ah, my take out tub…. (Cam C902)
For those of you who love take-out food you may notice my container is the little tub your garlic or chilli sauce arrives in when you order pizza! These tubs are ideal for storing seeds so don’t throw them out.
Ok, back to the columbine, once the petals have fallen off, a green seed pod can be seen.
 Green seedpod, leave it to dry (Cam C902)
This needs to dry out, taking about 4-6 weeks to turn brown and completely dry out. Once the seedpod is dry, looking down on the plant you should be able to see the seeds bursting out of pod, time to collect them before the wind sows them naturally.
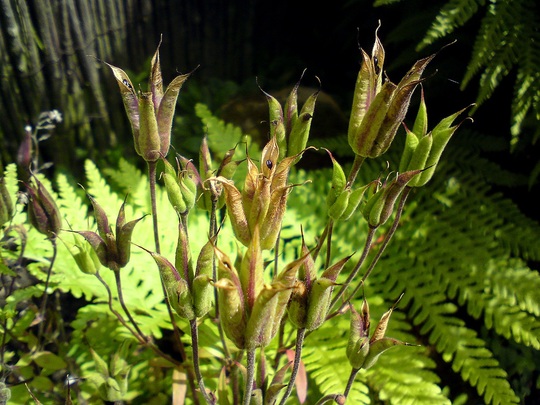 Time to collect (Cam C902)
Simply cut the seedpod off the plant with some scissors, keeping the seedpods face up so the seeds don’t fall out. I only take about 20% of the seedpods from each plant the other 80% I leave for Mother Nature to do what comes naturally. If there is a particular flower head you like, you can take more, similarly if there is a variant you don’t like then make sure none of the seeds propagate by collecting all seedpods and throwing them in the waste.
 You should be able to see the seeds bursting out of pod (Cam C902)
Nearly done, take your seedpod and turn it upside down in your container and the seeds will empty out. You might want to roll the seedpod between your fingers a few times to make sure you get all the seeds out, or give them a gentle tap. The little black seeds are unmistakable against the white of the container.
 Easy as that (Cam C902)

And that was it, all done. Write the name of the seed on the lid and you can then store the seed until you’re ready to sow them or give a packet of seeds to friends.
 16 Aug, 2011
 1 like
Previous post: Building a wildlife pond - Part 4
Next post: 50 Snakeshead Fritillary for only 1p + P&P (£4 total) @ JParkers
Comments
I just love collecting seeds. Free plants....great!!
16 Aug, 2011
Apart from these usual varieties, have you a collection of Semi Aquilegias too ?
They're gorgeous, i think i like them more than the standard ones and, they seem to be getting more popular and easier to find now :-))
17 Aug, 2011
Hi Granny, how are those eggs? :¬) thanks all, Louise I don't have any 'Semi Aquilegias' (had to google to find out what they looked like)
17 Aug, 2011
Featured on
Recent posts by sean50p
- 50 Snakeshead Fritillary for only 1p + P&P (£4 total) @ JParkers
8 Oct, 2011
- Building a wildlife pond - Part 4
13 Aug, 2011
- Building a wildlife pond - Part 3
13 Aug, 2011
- Building a wildlife pond - Part 2
13 Aug, 2011
- Building a wildlife pond - Part 1
13 Aug, 2011
- Breaking the ice...
13 Aug, 2011
Members who like this blog
-
Gardening with friends since
9 Aug, 2009
-
Sweet Pea Seeds Everlasting Mix

£2.45 at Suttons Seeds -
Mina Lobata Seeds

£2.65 at Suttons Seeds -
Heliotrope Marine Seeds

£2.85 at Suttons Seeds -
Sensitive Plant Seed

£1.85 at Suttons Seeds -
Verbena Bonariensis Purple Elegance Seeds

£1.49 at Suttons Seeds
yeah, real danger sean50p. no only joking, that's how i collected my "Delphinium" seeds two years ago. They are now healthy plants waiting to be planted into the border next spring.
16 Aug, 2011